Škoda Felicia - Headlight Tinting
Introduction
I'll leave the legality of this modification up to each of you. I ran these tinted headlights on my Felicia for about 6 years, travelling across the entire Czech Republic and Germany, and never encountered any issues. During headlight inspections at the MOT, the light output was never affected. Likewise, during roadside checks by the Czech police, the modified headlights were never subject to any scrutiny. However, even though this is a cosmetic modification, you take full responsibility for the fact that it may violate the headlight homologation.
In short: You make these modifications at your own risk and judgement — the argument "someone on the internet told me to do it" won't hold up anywhere. If you're aware of this, then I've prepared a very simple guide for you.
Preparation
We only need basic tools and materials:
- 10 mm socket with a small ratchet
- Phillips screwdriver
- Small flathead screwdriver
- Plain black spray paint for tinting (I use matte, but gloss works just as well)
- Masking tape (regular paper type)
- Small brush
- Scalpel or razor blade
- For pre-facelift: 8 mm open-end wrench (grille removal)
- Optional: Plain blue or any colour spray paint for the bulb shield
- Optional: New stainless steel headlight screws with washers to replace the originals
Headlight Removal
Removing the headlight is, like everything else on the Felicia, very straightforward. For owners of facelift models (hereafter FL), it's even a bit easier. On pre-facelift models, there's also a difference between engine variants due to the size and position of the radiator.
Pre-facelift Models
Unfortunately, I don't have photos for the pre-facelift, but the procedure is as follows:
Open the bonnet.
Remove the two screws (10 mm head) located on top of the grille between the headlights.
Through the small access holes beside the radiator, one on each side, remove two more screws (10 mm head) holding the grille:
- For the 1.9 D and 1.6 engines, you need to loosen the upper radiator bolts and move the radiator to the side.
Remove the indicators:
- Disconnect the connector from the back of the indicator (or twist the bulb holder and pull it out together with the bulb).
- Press the release tab towards the indicator to unlock it, then push it out in the direction of travel (if the indicator hasn't been removed in a long time, gently rock it by the bulb holder up and down until it comes free).
Through the indicator opening, you now have access to two screws (8 mm head) that hold the grille from the sides — remove these and take off the grille. From here, the procedure is the same as for the FL after removing the trim strips below the headlights.
Facelift Models
Open the bonnet.
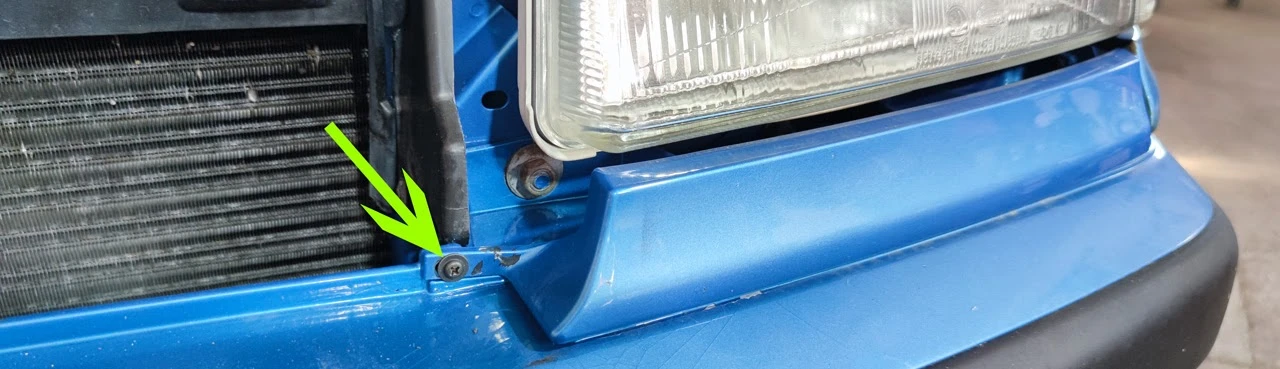
Unscrew the small screw on the trim strip below the headlight:
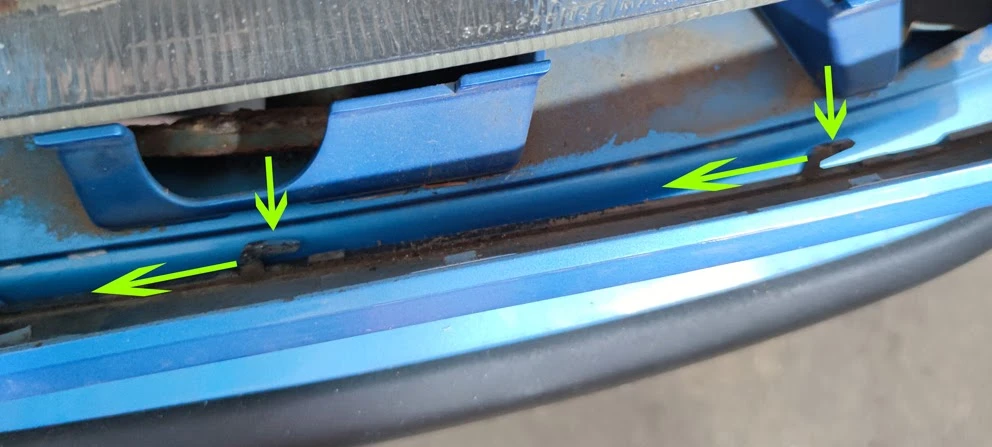
Remove the strip by gently pushing it towards the radiator — i.e. standing in front of the car, push the strip on the right-hand side (driver's side) to the left, and vice versa for the other strip:
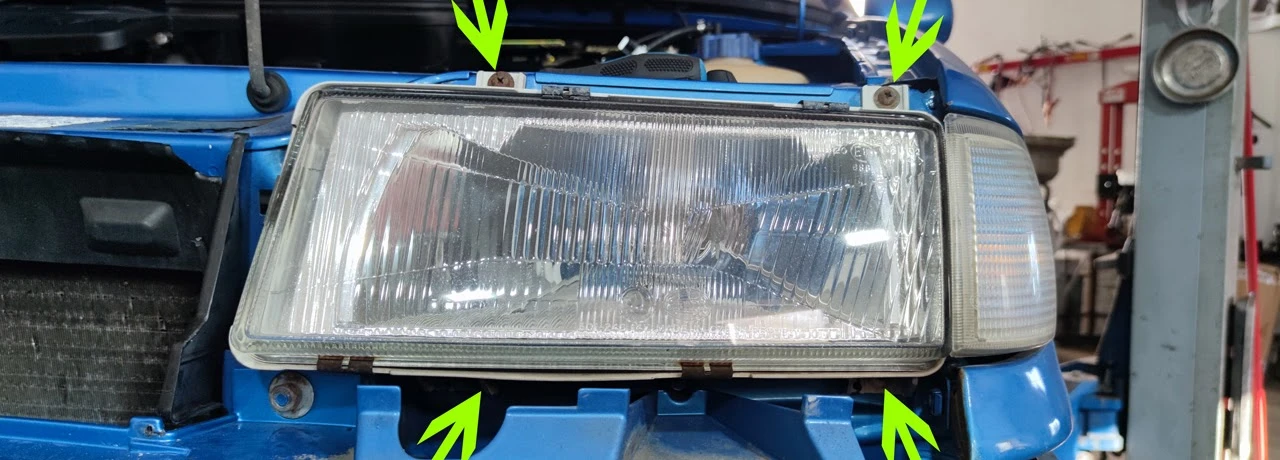
Unscrew all 4 screws holding the headlight:
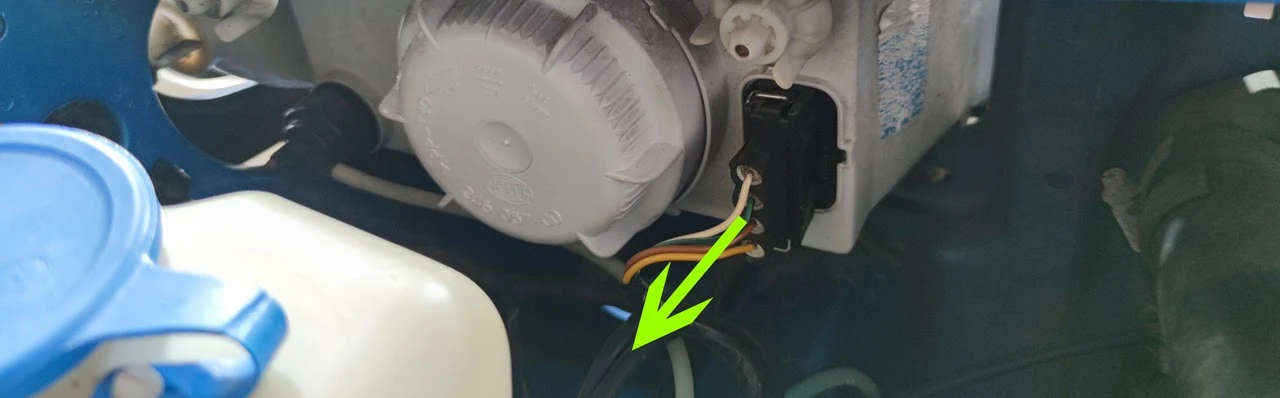
Disconnect the headlight connector on the back:
Pull the headlight including the indicator forward in the direction of travel and disconnect the indicator connector:
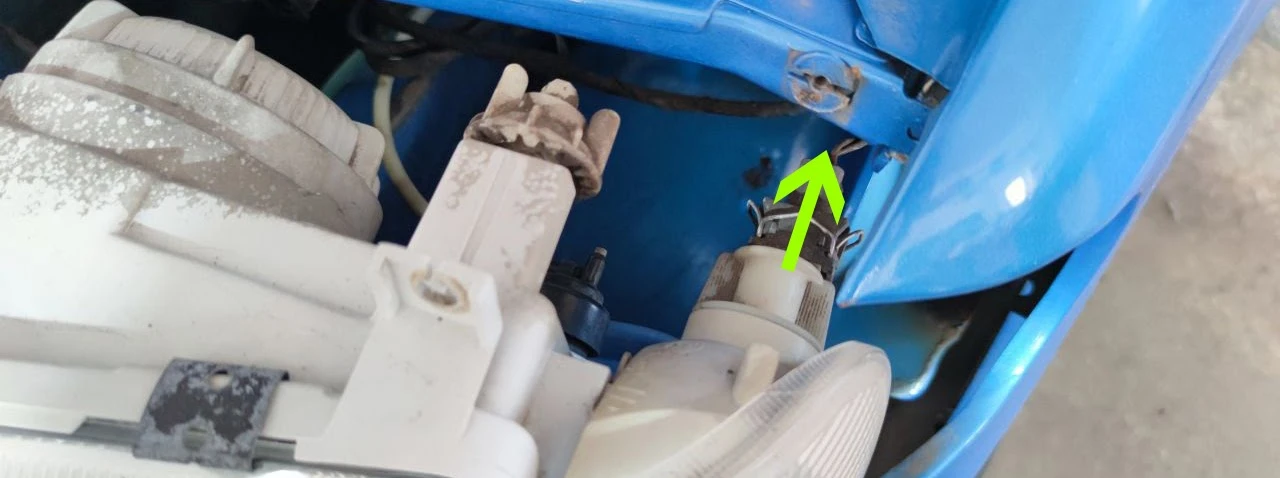
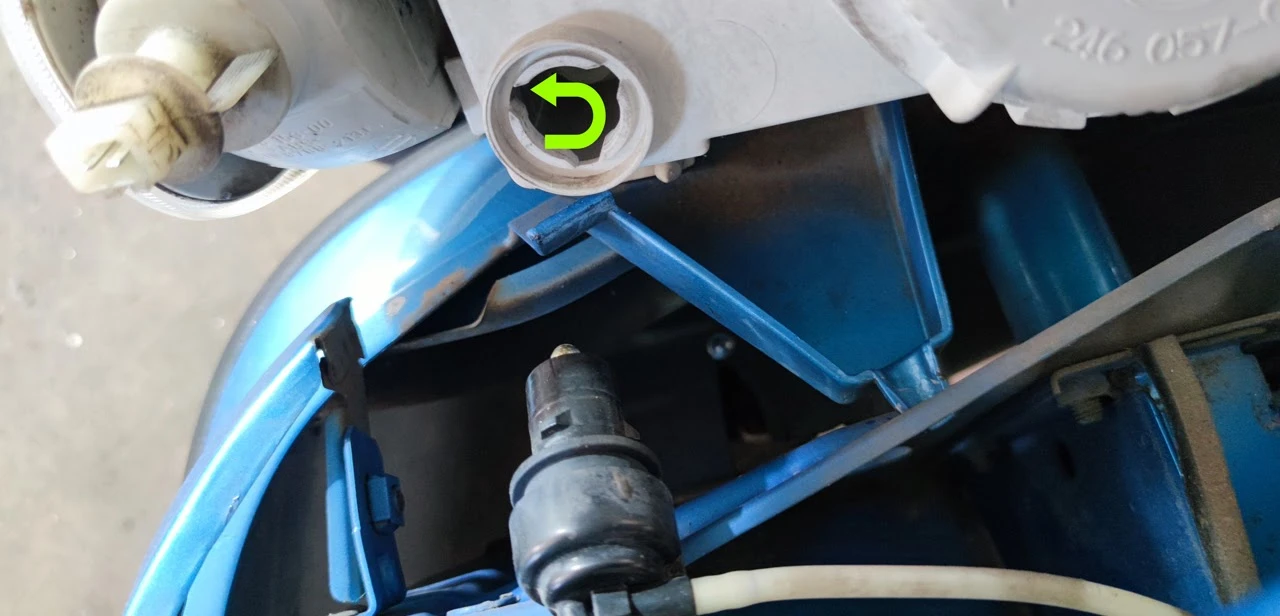
Pull the headlight out a bit more and remove the headlight levelling mechanism by twisting:
Take the headlight aside and remove the indicator by pressing the release tab towards it to unlock it, then push it out in the direction of travel (if the indicator hasn't been removed in a long time, gently rock it by the bulb holder up and down until it comes free):

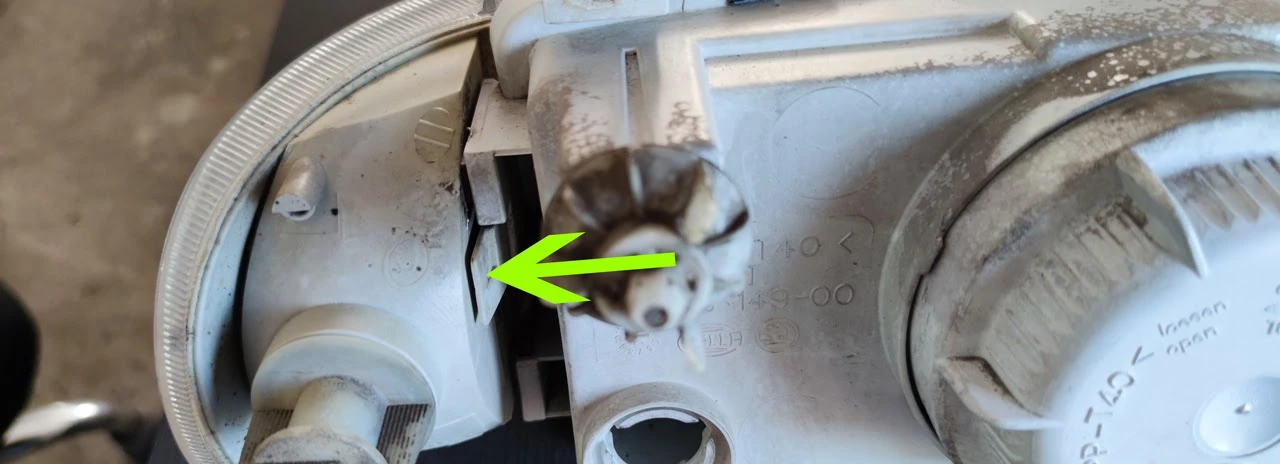
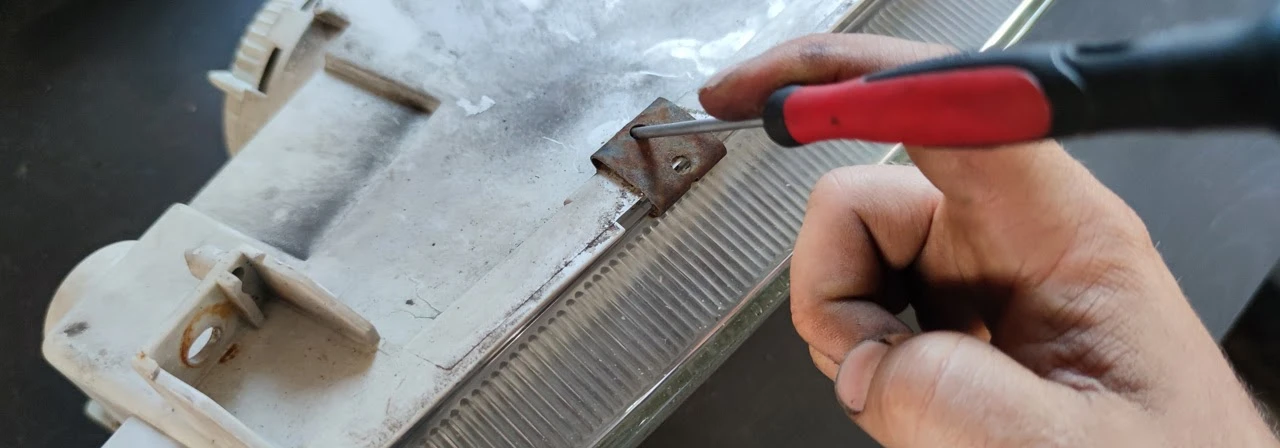
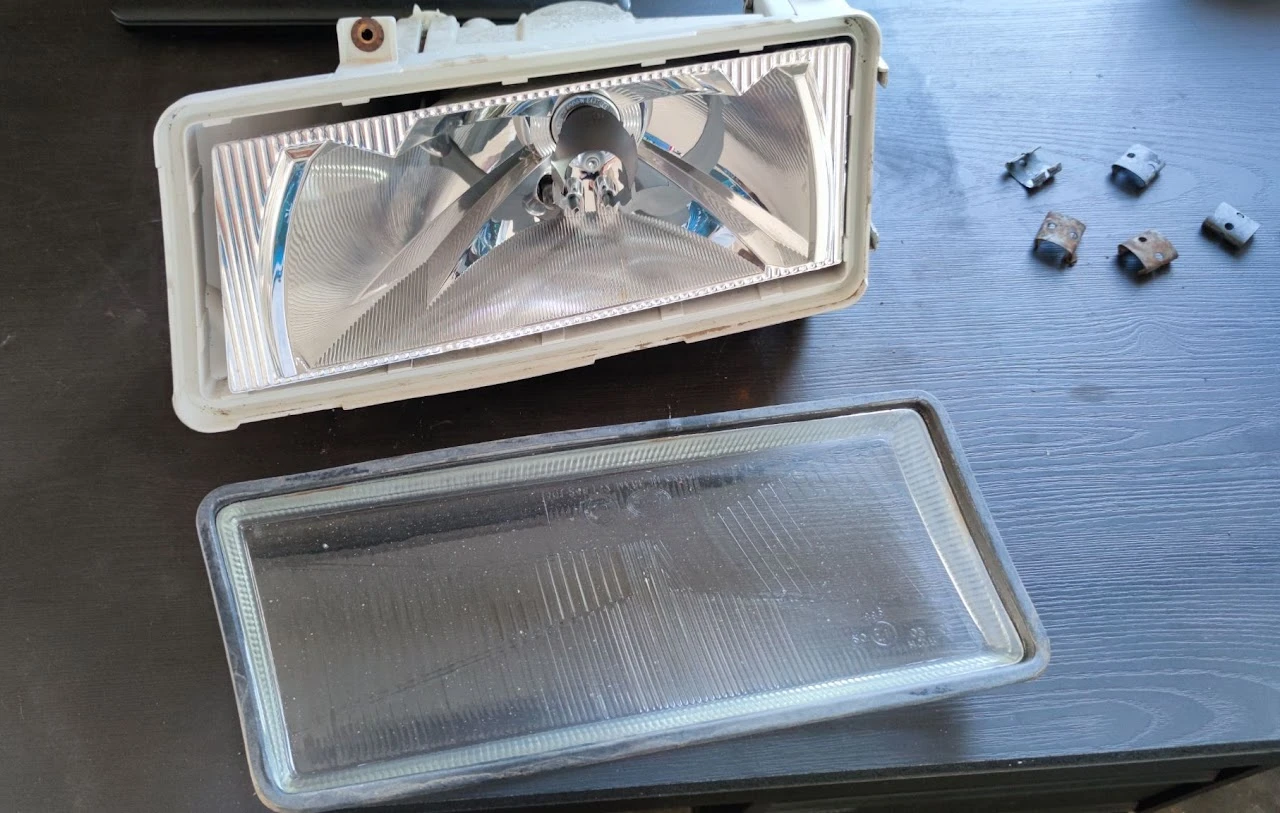
Remove the 6 metal clips around the perimeter of the headlight that hold the lens in place:
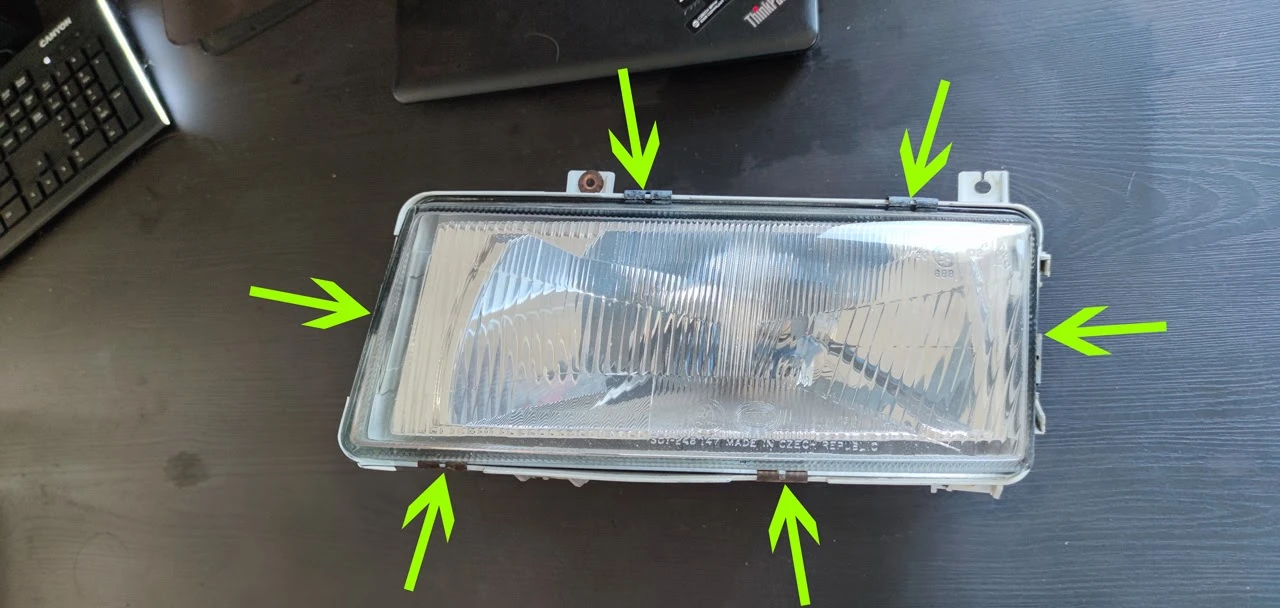
Simply take a small screwdriver, insert it through the hole in the clip and pry against the plastic — the clip will pop out. Always pry against the rear plastic part of the headlight, as it's flexible and can take the pressure. Do not pry against the glass, because it can easily crack:
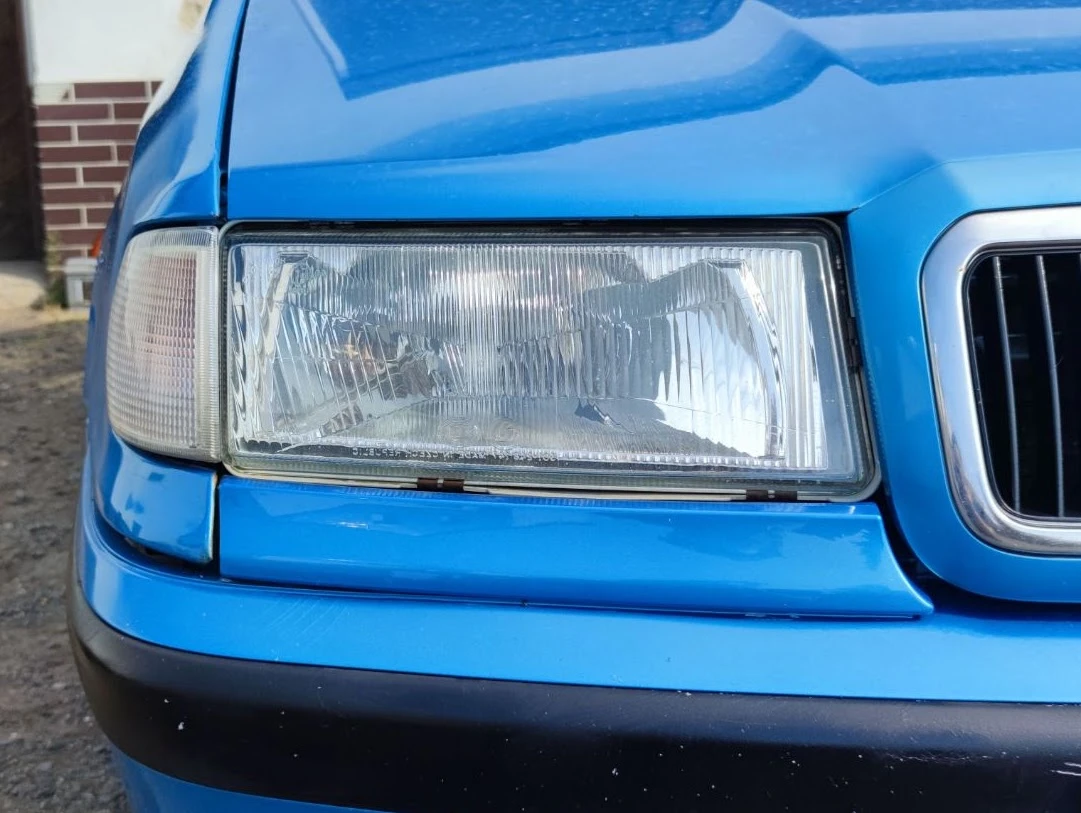
Carefully remove the headlight lens:
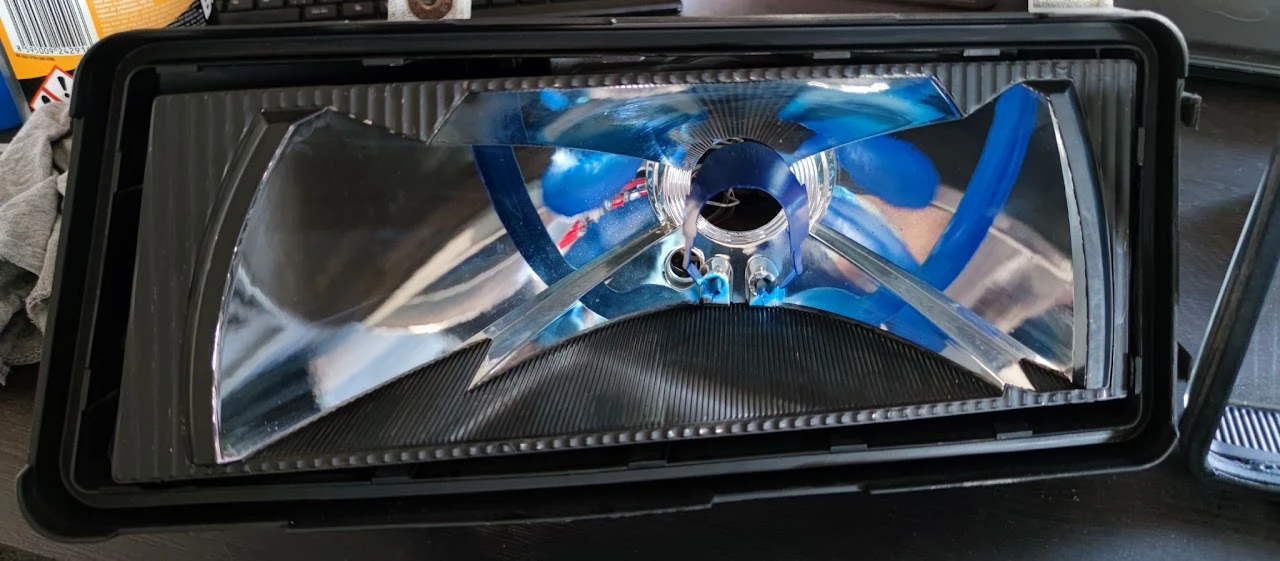
If you wish, you can modify the bulb shield. By repainting it, you'll get a coloured reflection in the parabola. Since I use OSRAM Coolblue blue-tinted bulbs, which already produce this reflection on their own, I choose blue to make the effect even more visible. However, you can skip this step entirely:
Painting the Bulb Shield (Optional)
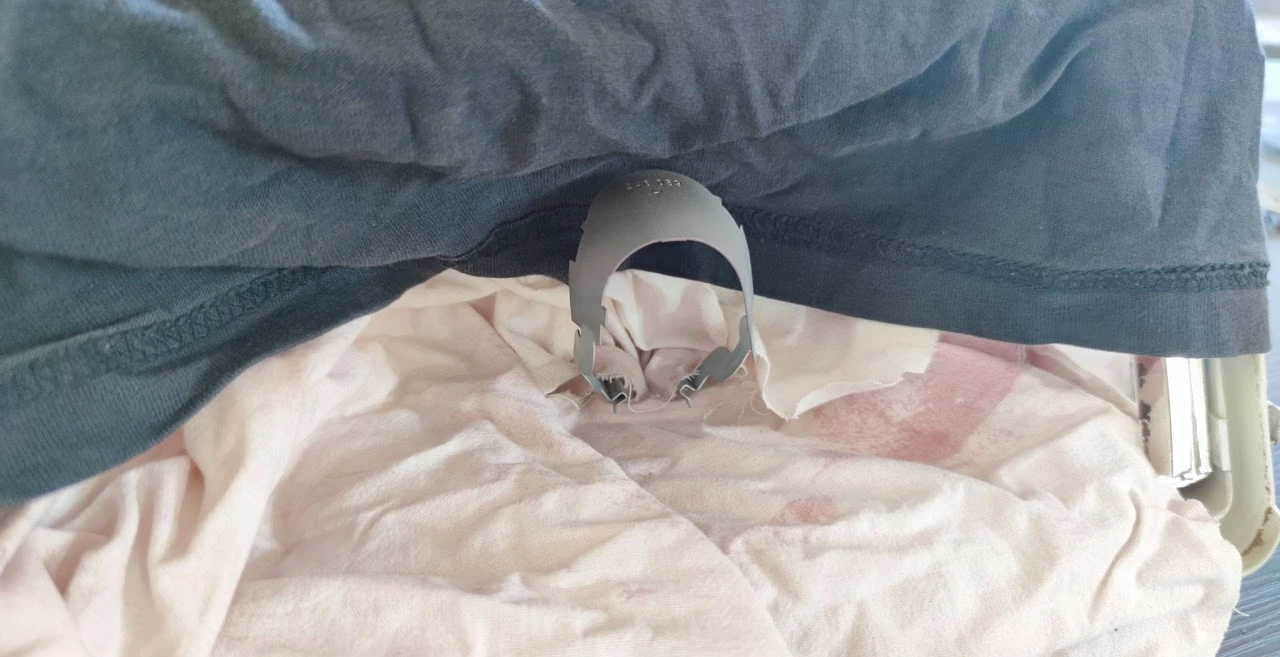
Remove both bulbs from the back along with their holders/connectors — the W5W parking bulb and the H4 main bulb. Carefully line the area around the shield inside the chrome parabola with rags or paper. Be very careful not to touch the chrome! There is a risk of irreversible damage from scratching or even mere contact:
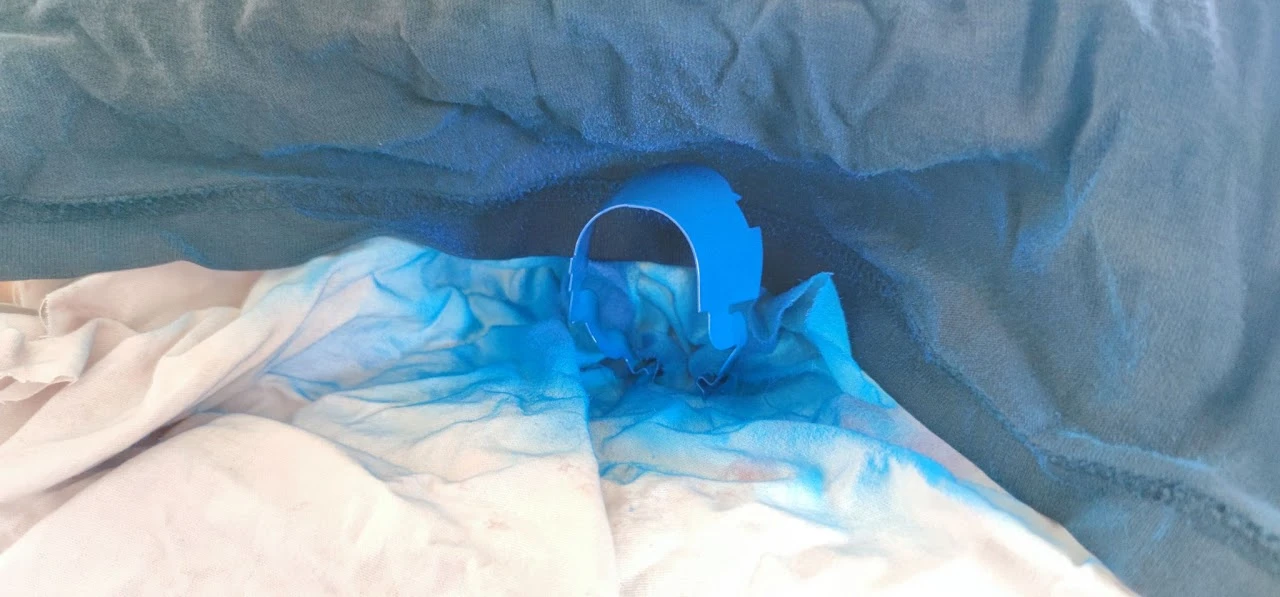
Paint the shield with your chosen colour, making sure the rags seal properly so that paint doesn't spray onto the parabola:
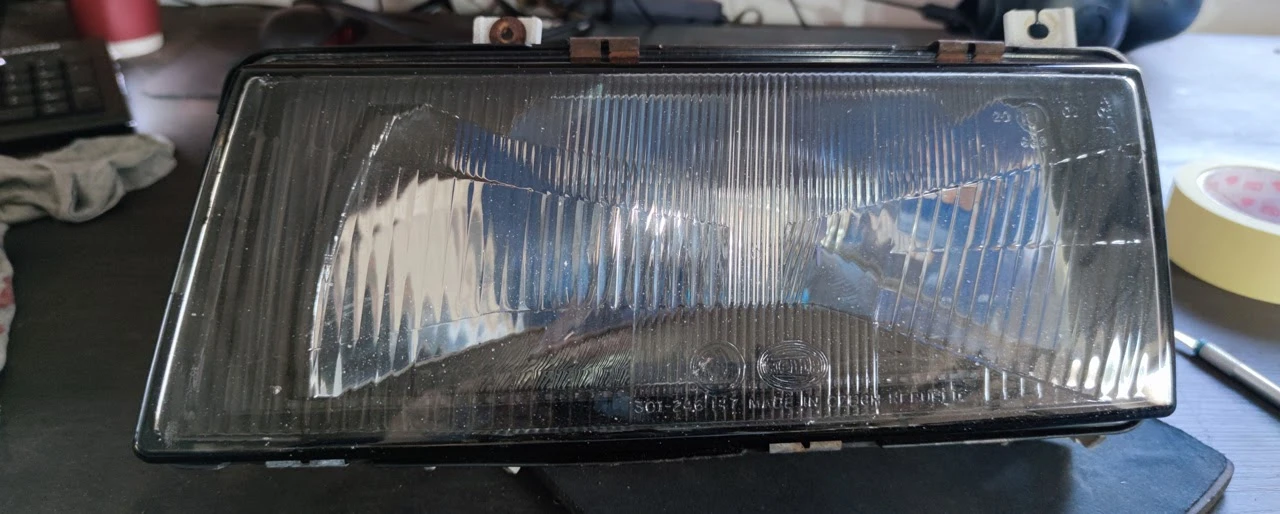
Painting the Headlight Lens
If we're not painting the shield, or while we're waiting for the paint to dry on it, we can move on to painting the side walls of the headlight lens. Paint generally doesn't adhere very well to glass, but since we'll be applying it on the inside where it won't come into contact with anything, it will last for years without any issues.
I've seen many people who tinted their headlights from the inside skip this step, and the result is that the headlight surroundings show through the glass from outside and ruin the overall effect.
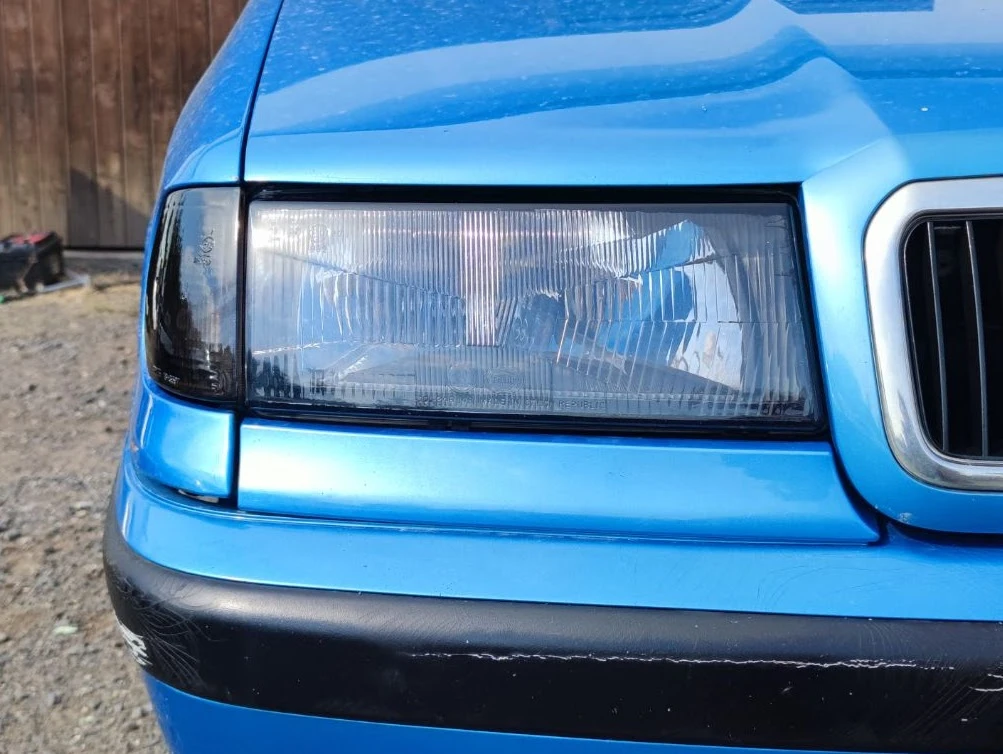
Place the lens on a soft surface to avoid scratching it, degrease it with rubbing alcohol or white spirit, and cover the inner surface with masking tape, then trim it with a scalpel so that only the side walls of the lens remain uncovered:
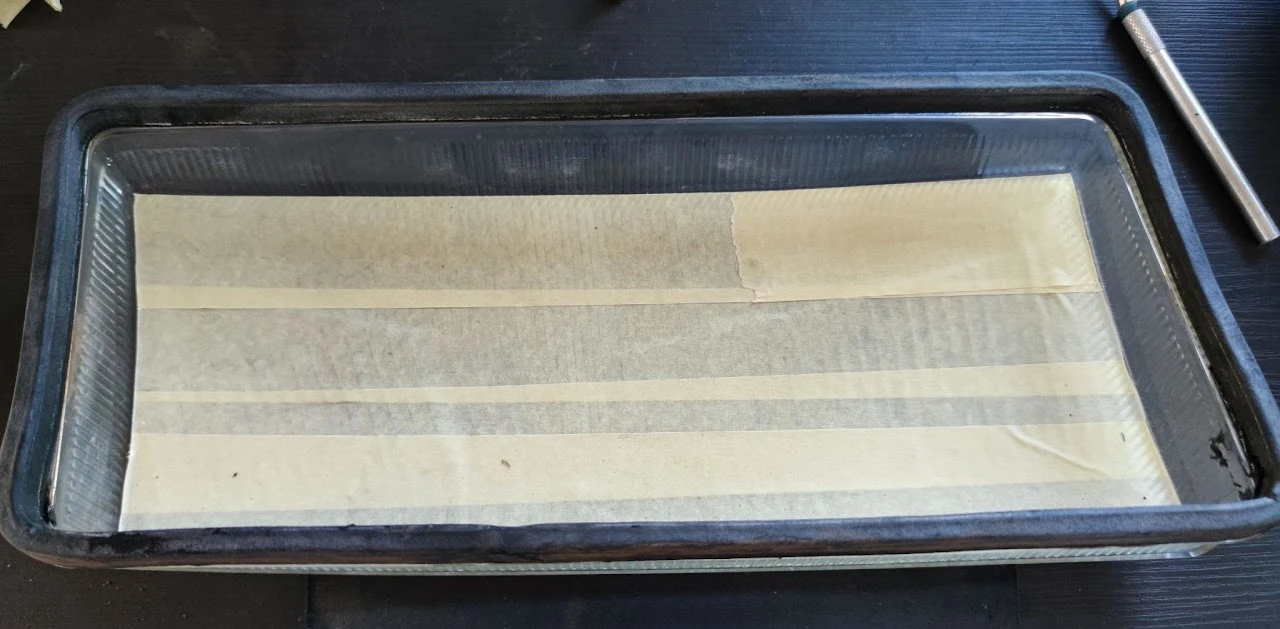
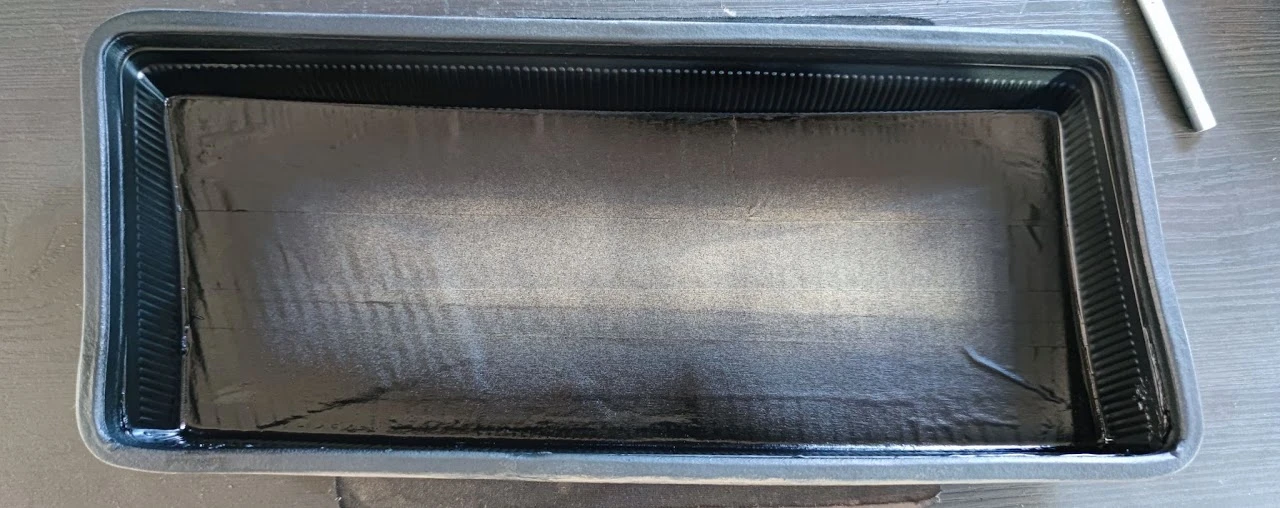
Spray the walls with black paint in several thin coats. Avoid applying thick layers — it's better to apply the paint 4–5 times so it doesn't run onto the masking tape:
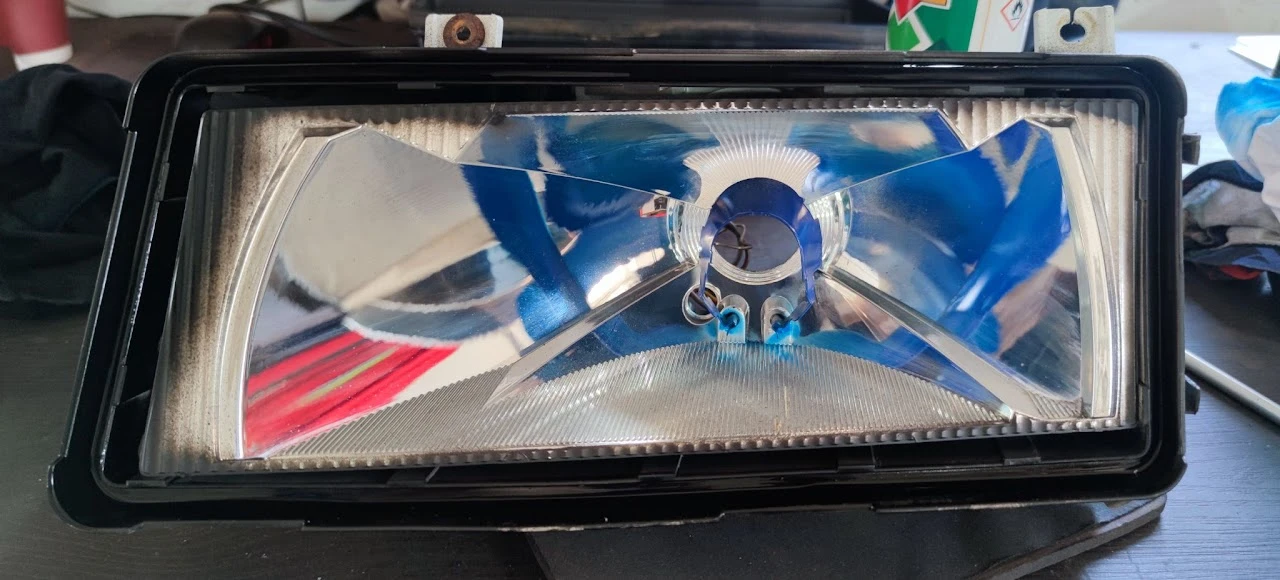
While the paint on the lens is drying thoroughly, we can turn our attention to the parabola and the interior of the headlight. We'll be applying black paint to the areas highlighted in green. We do not paint the parts that are smooth and reflective; on the other hand, the textured parts can be painted:

If we didn't paint the shield or it's already perfectly dry, place rags/paper inside the parabola and around the shield so that we can spray the white plastic around the headlight. Be careful not to splatter or send paint flying onto the parabola. Spray mainly into the space between the chrome parabola and the white plastic housing so that the entire headlight interior appears black when viewed from the front:
Remove the rags/paper and spray a small amount of paint into a container to the side (ideally into the spray can cap, for example). Let the paint in the cap dry slightly so that it's tacky and sticky but still easy to brush on. Using a small brush, outline the edges along the bottom of the headlight — this marks out the line and also prevents us from unevenly smearing the reflective part of the parabola in the next step:
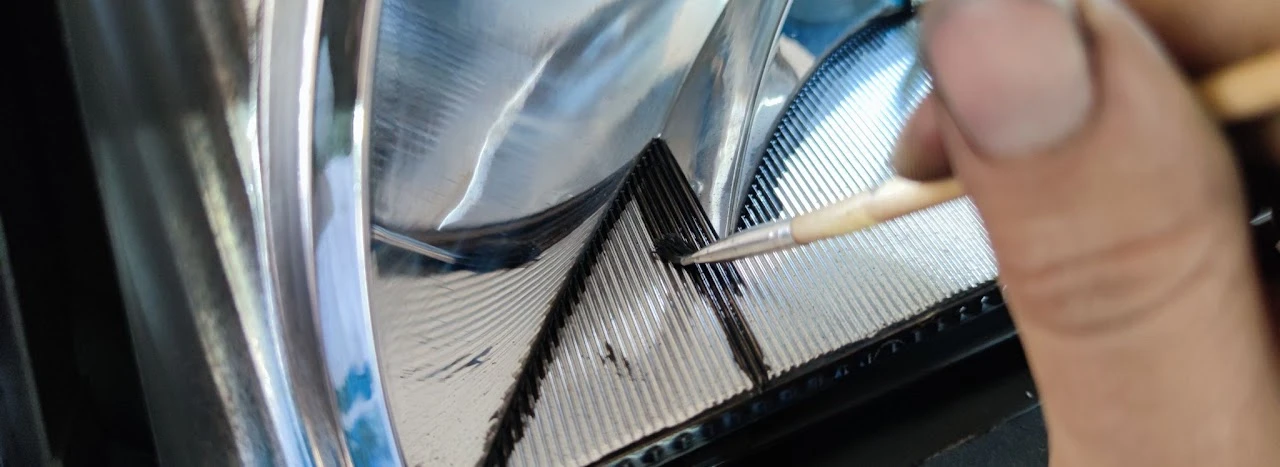
Then continue with the brush to fill in the remaining surfaces, including the front-facing ones on either side of the parabola. Don't worry too much if some brush strokes leave certain areas imperfectly covered — in the final result behind the glass, it'll be completely invisible. The aforementioned technique of brushing with slightly dried paint helps. The overall result should look like this:
If a drop of paint has splattered or dripped somewhere, you can very carefully wipe it off with an absorbent cloth or tissue soaked in thinner — again, be very careful not to damage the chrome in the parabola.
Reassembly
Once everything is dry, we can reassemble the headlight in reverse order: Put the bulbs back in if we removed them, fit the lens back on, and snap the clips back into place:
Snap the indicator back in, place the headlight back on the car, connect the indicator connector, reattach the headlight levelling mechanism, and plug in the headlight connector. Screw the headlight back in and refit the grille (pre-FL) or trim strips (FL).
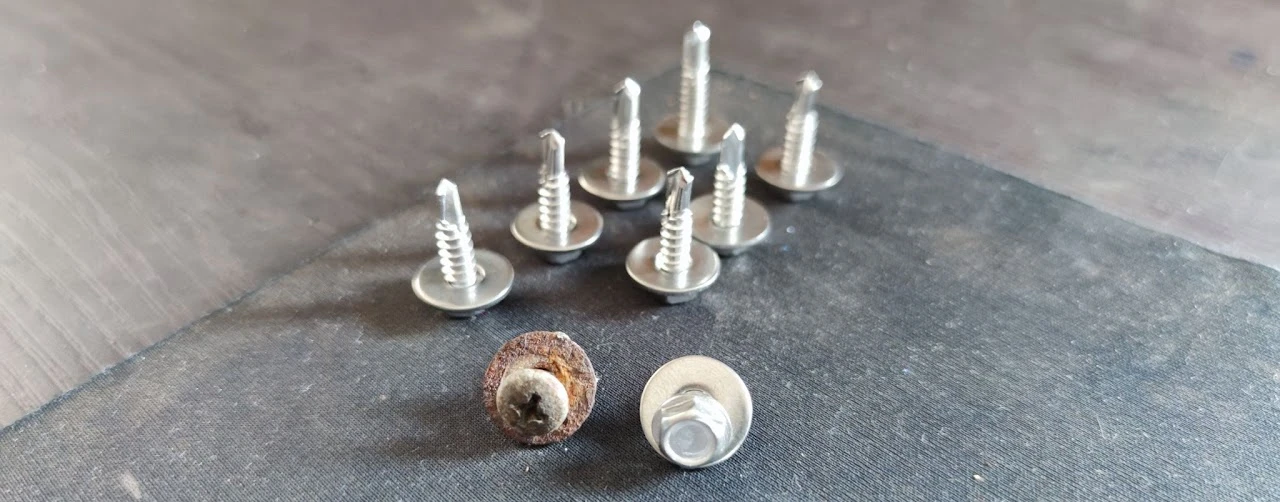
When refitting, I recommend replacing the headlight screws with new stainless steel ones including stainless washers. I had stainless self-tapping screws of the right dimensions on hand, with a hex head that suited me, and since the cutting portion on them is shorter than the thread, there was absolutely no issue using them as replacements — see comparison with one of those that were on the car:
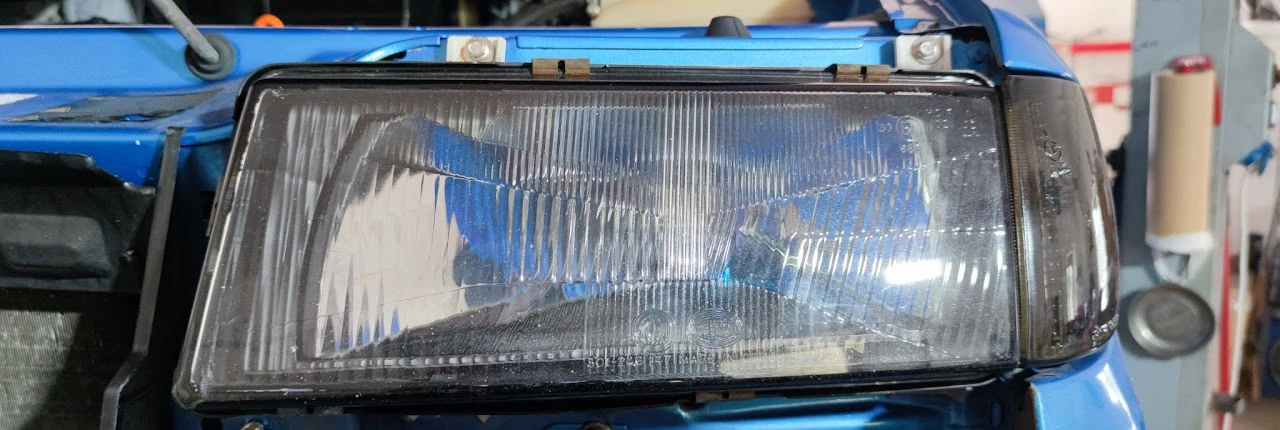
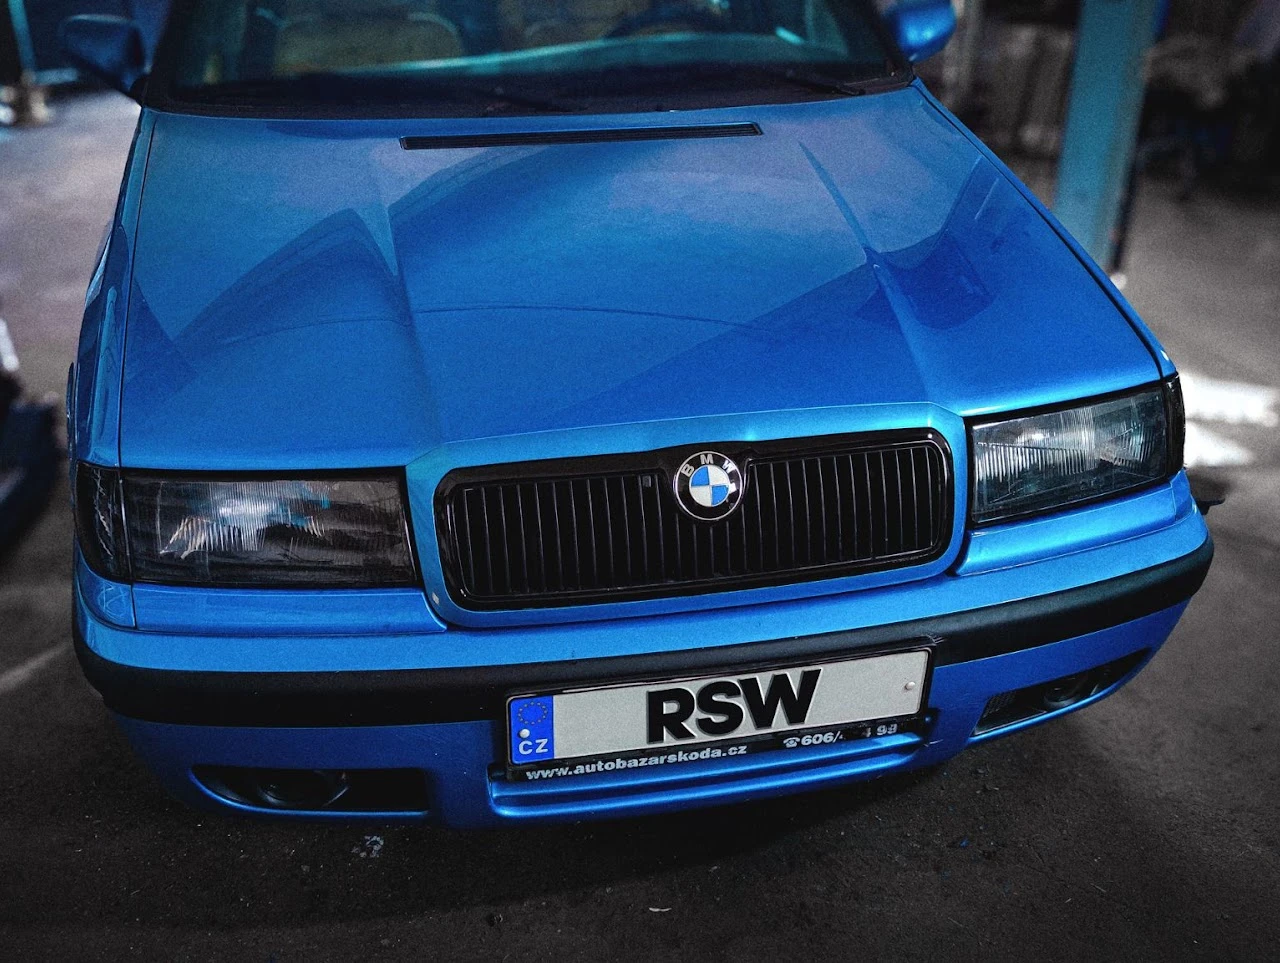
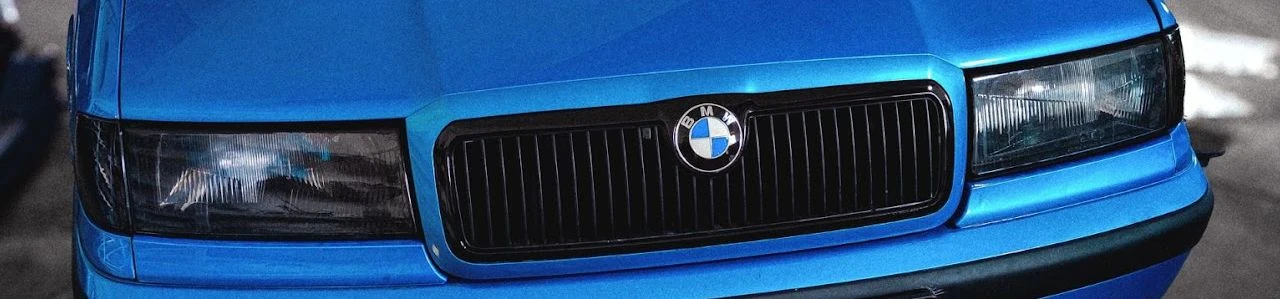
The result on the car, including tinted indicators, fog lights and headlights: